Scan your first library
Add a library path, run a focused first scan, monitor the job, and verify the result.
Before you scan
A scan inventories files that Cove can reach. Start with one small, representative folder when possible; it makes path, permission, and file-type problems easier to diagnose before you scan the whole library.
- Make sure the Cove process can read the source media.
- Make sure Cove can write to its configured generated-assets directory.
- For Docker, confirm the media volume is mounted and use its container path, such as /media, in Cove. A host path is not visible inside the container unless it is mounted.
- Keep a copy of important metadata or a current backup before pointing Cove at an established library.
Add or check the library path
The first-run setup wizard asks for library paths when you choose Start Fresh. On an existing installation:
- Open Settings → Library → Paths & Storage.
- Select Add path and enter a directory Cove can access.
- Select any media types that should be excluded from this path. Leave a type unchecked to include it.
- Wait briefly after editing. Settings auto-save after a short delay; there is no separate Save button on this page.
Open Settings → Library → Scanning & Assets if you need to change the generated or cache path, file exclusions, or generation settings before the scan.
Run the scan
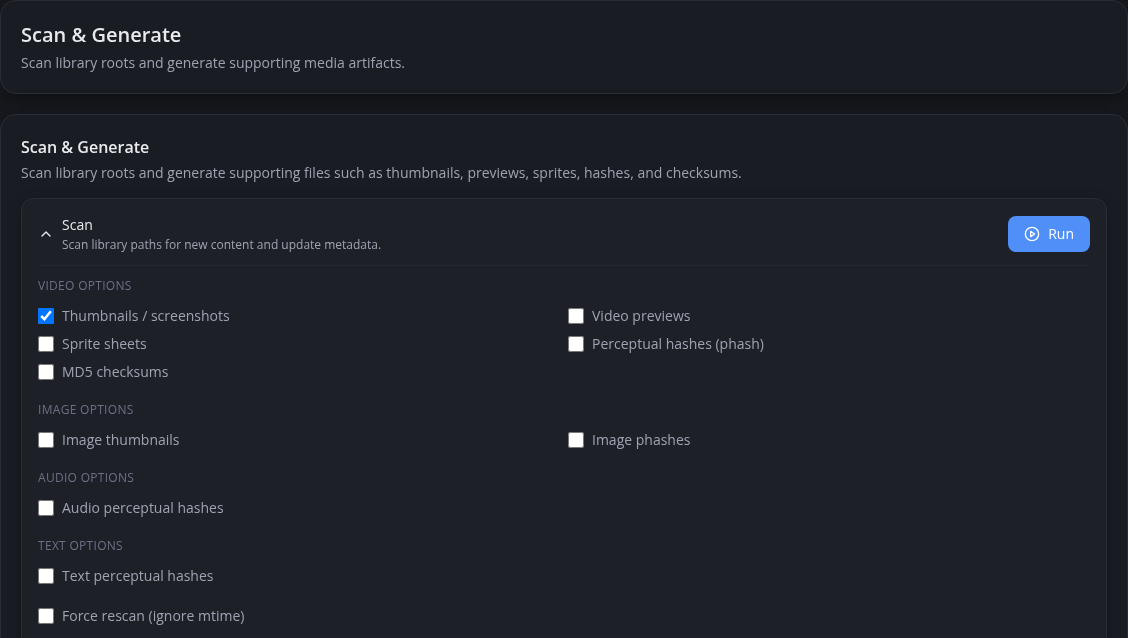
- Open Settings → Operations → Scan & Generate.
- Expand Scan.
- Choose which generated assets to create during the scan, such as video covers, previews, sprite sheets and hashes, or image, audio, and text fingerprints.
- Under Selective scan, select the small folder you want to test. Leave every folder unselected only when you intend to scan the whole library.
- Leave Force rescan (ignore mtime) off for the first pass. It is a recovery option for files Cove previously considered unchanged.
- Select Run on the Scan card.
Monitor the job
Open Settings → Operations → Jobs. The page shows running and queued work plus recent completed, failed, or cancelled jobs. Wait until the scan completes before judging the result. If it fails, record the error and time, then investigate before running a broader scan.
Verify the result
- Open the corresponding top navigation page: Videos, Images, Audios, or Texts.
- Confirm that files from the test folder appear and open one item.
- Check that the displayed path and media type are correct.
- If you requested generated assets, confirm the selected cover, preview, or other artifact appears after its job completes.
- Return to Settings → Operations → Jobs and confirm there is no failed follow-up work.
A scan records file paths, media types, file details, and processing state, and creates only the generated artifacts you selected. Tags, performers, studios, groups, segments, and richer metadata can be added later without changing the source file.
Recover from a bad first scan
- No items appear: recheck the configured container path, Docker volume mount, per-path media exclusions, and configured file extensions.
- Only some files appear: inspect the scan job error and logs for unreadable paths, unsupported files, or exclude-pattern matches.
- Generated assets fail: verify the generated path is writable and review FFmpeg messages in Settings → System Info → Logs.
- A moved, replaced, or unchanged file was skipped: select only its folder and retry with Force rescan (ignore mtime). Do not force-rescan the whole library unless necessary.
- The job is still running: do not queue repeated full scans. Monitor or cancel the existing job under Settings → Operations → Jobs first.
Once the representative folder is correct, repeat the scan with additional folders or leave Selective scan empty to process the whole library.